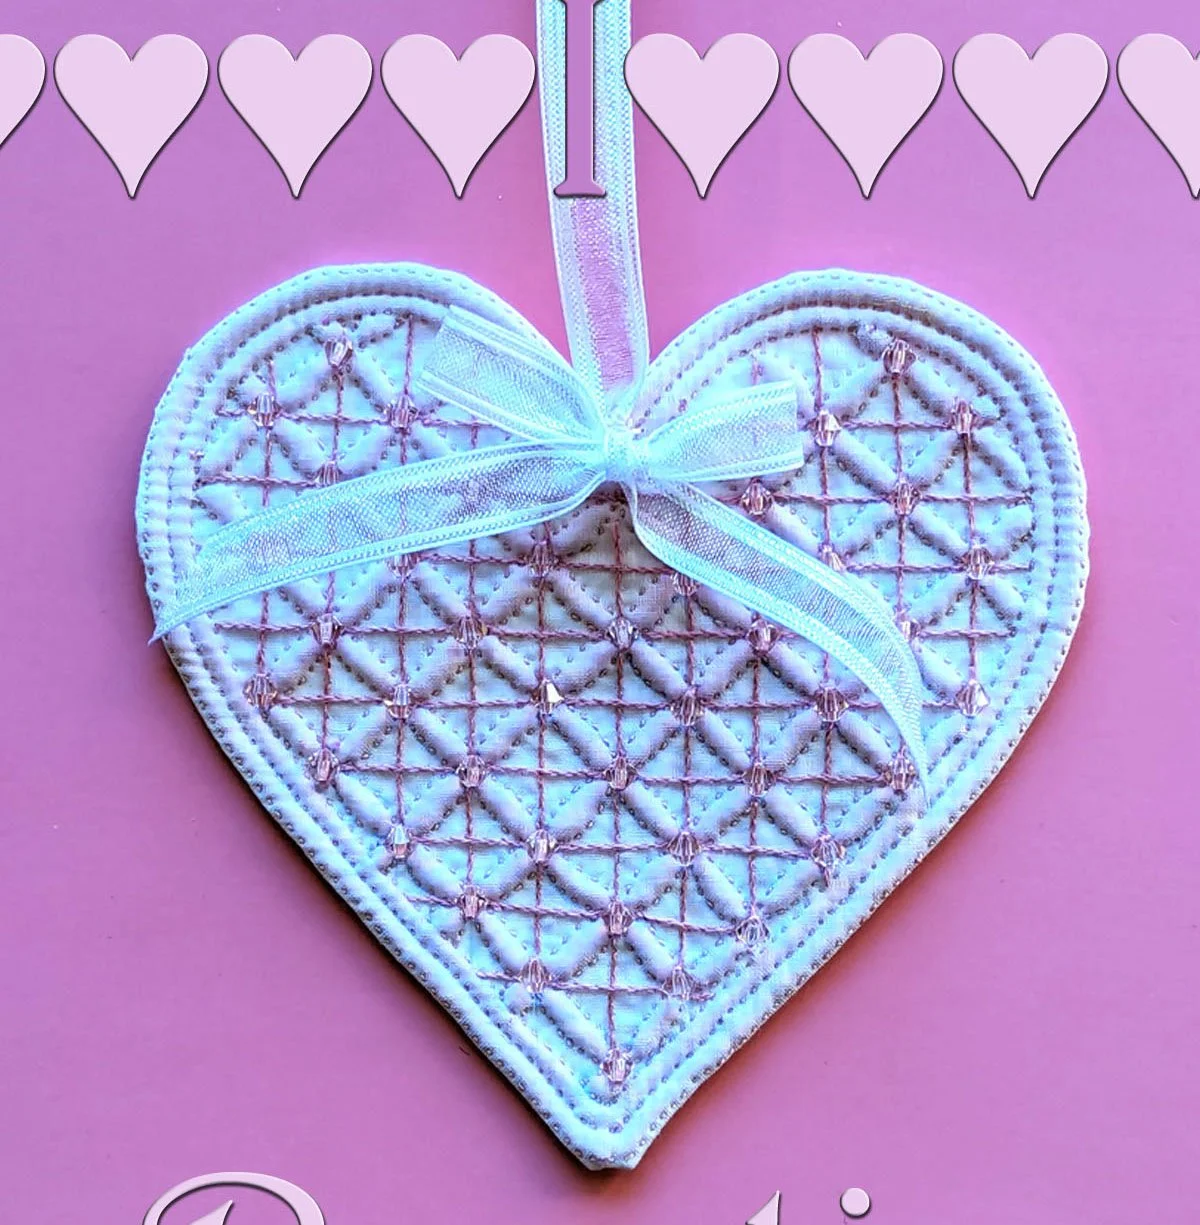
Learn Boutis: Stitching
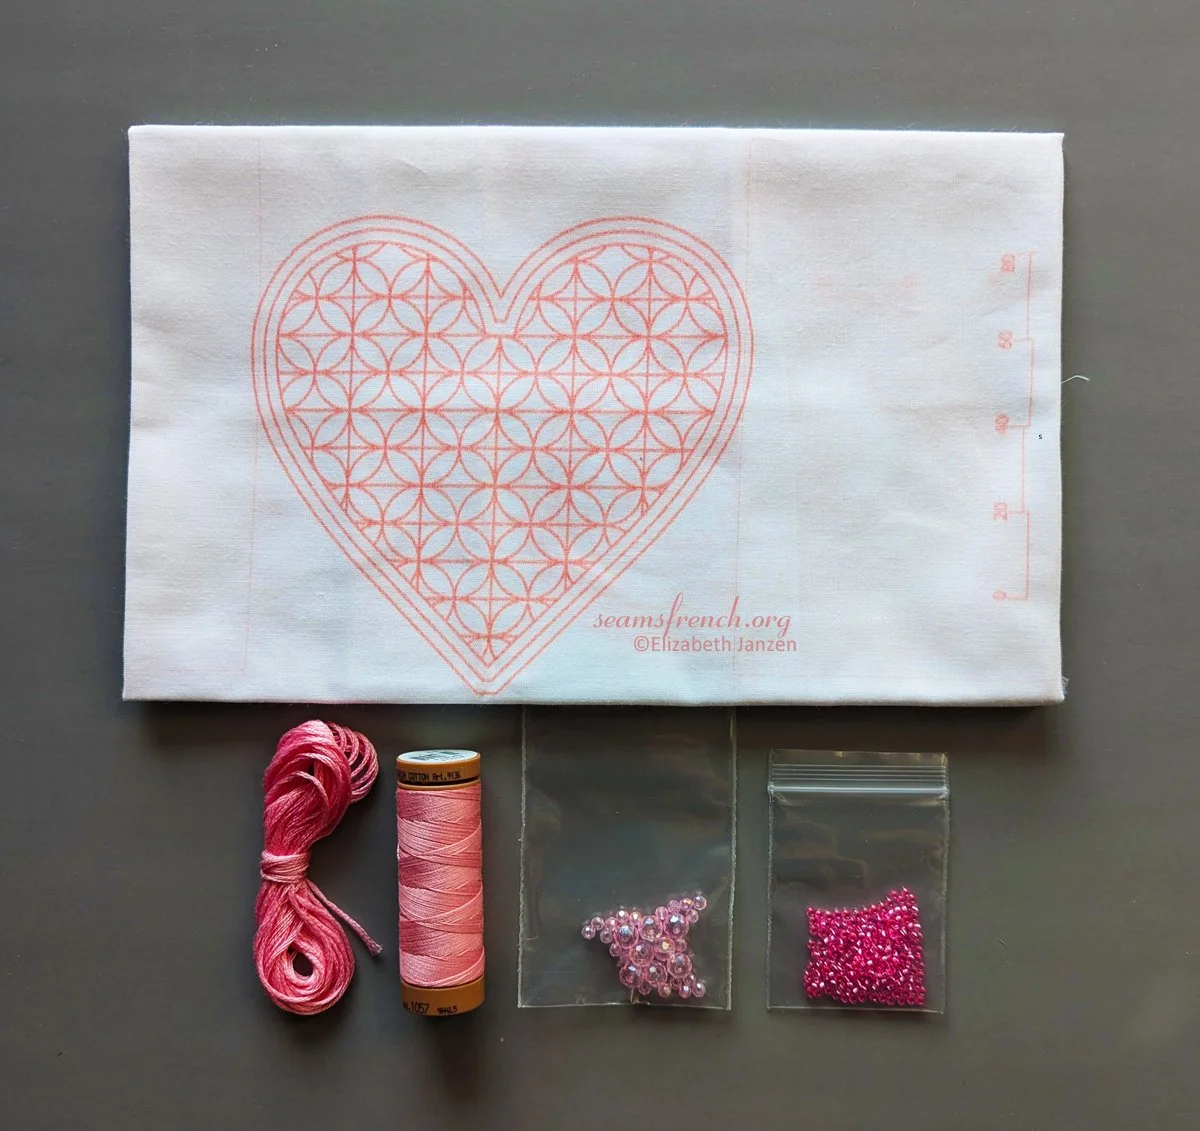
Additional supplies you will need (see right)
- 40 wt. cotton thread
- embroidery floss
- Beads (Optional)
You will need:
- #10 quilting needle
- embroidery needle
- embroidery hoop (4”- 4.5”), - thimble
- embroidery scissors
Heart #3: Coming Soon

Stitching: (Le Piquage)
We will use Heart #1 as our example in this little tutorial. The same basic technique will apply to all three hearts. (Please refer to the previous tutorials under the heading “Learn Boutis” for the pattern and for the supply list.)
For those unfamiliar with the stitches, I have included directions for the stitches used in this project.
The Stitches:
The entire project can be made using only a running stitch, and an anchor stitch to lock the stitches at the beginning and end of a thread. If you prefer, a tiny Backstitch or a Stem Stitch may replace the running stitch to stitch the motifs and channels. If there are embroidery lines in the pattern, they may be stitched first or after the channels are stitched, but must be stitched before the cording stage.
Anchor Stitch: To Start and End every row
To ensure that the stitches are locked in and secure, a tiny anchor stitch is made at the start of a row and at the end of a thread. If it can be avoided, never end or start a new thread in the middle of the row. Always start at the beginning of a row, or at a corner.
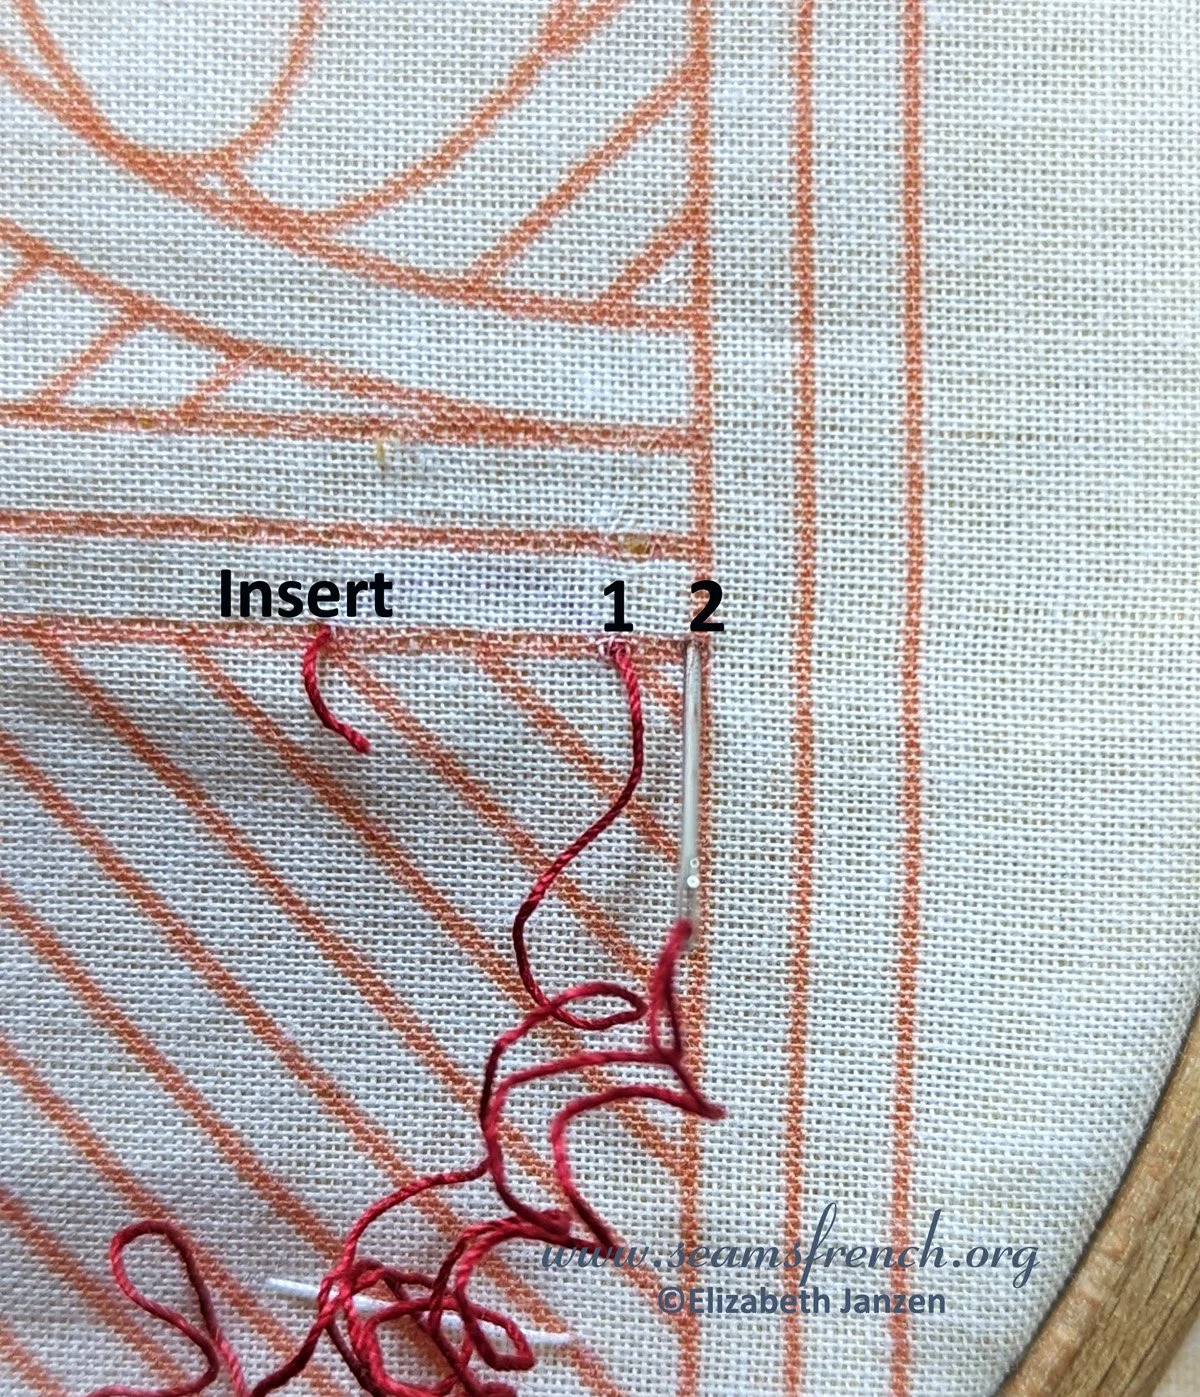
(Left)
1. Thread a needle with a 16”-18”” length of thread.
2. Make a tiny 2 wrap knot at the end of the thread and insert it in between the two layers of fabric at the point marked “Insert”. (See left) This will bury the knot and keep it hidden.
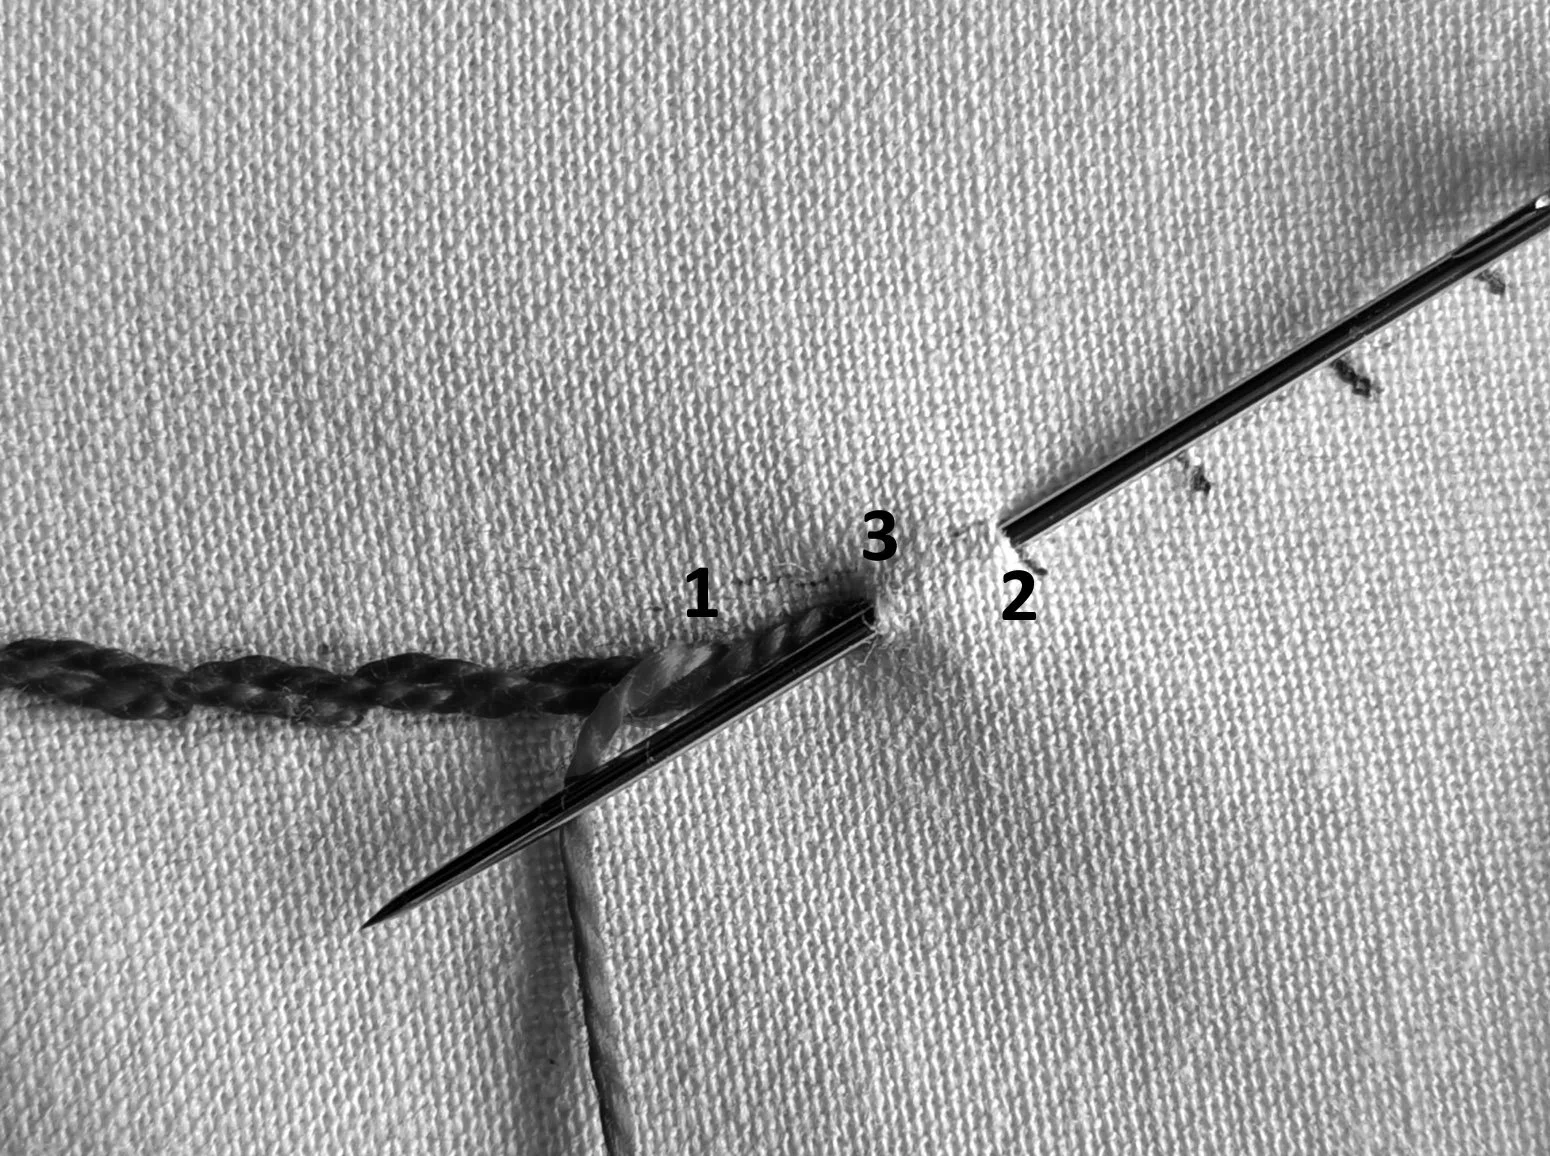
3. Keeping the tail of the thread underneath the stitching line, stay between layers, and glide the needle to the starting point (#1) and take it to the top, (which is one stitch in front of the first stitch of the row).
4. From the top, take the needle one stitch length back and stitch down at #2.
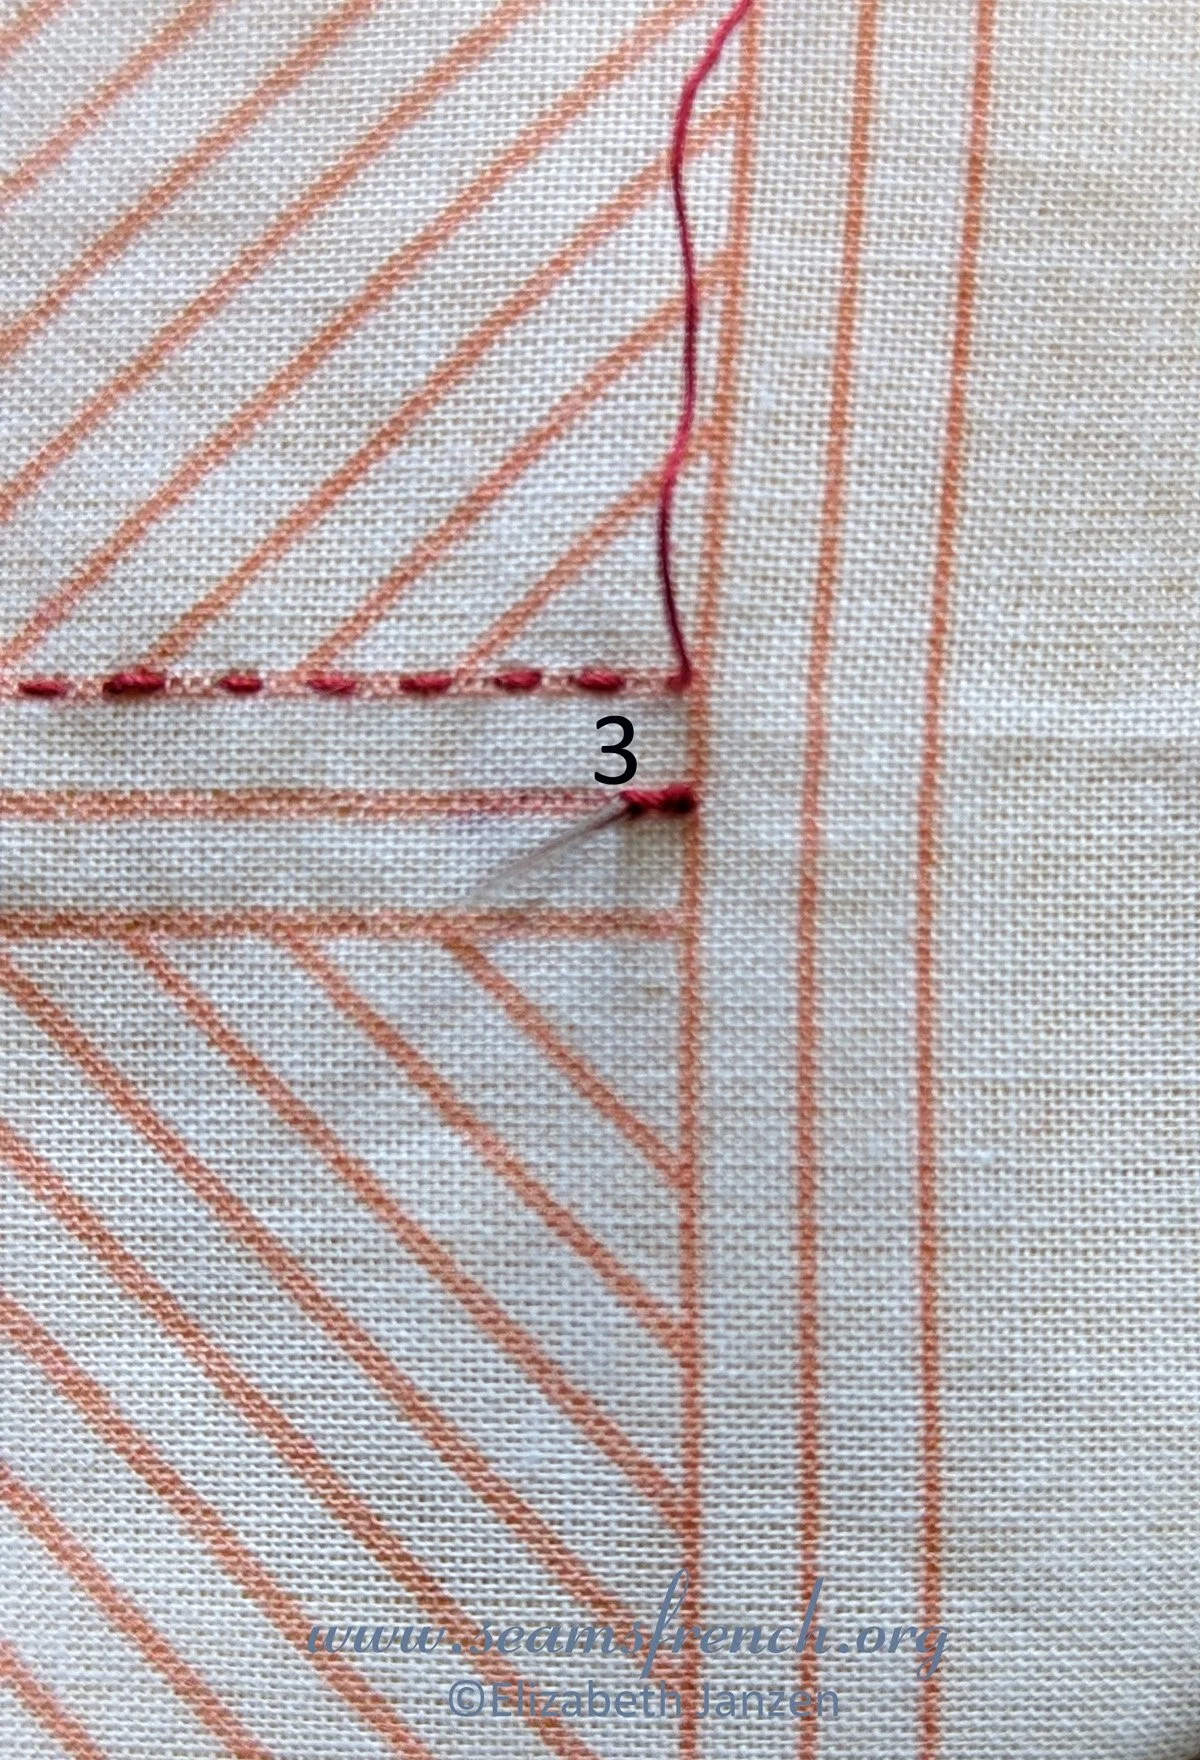
(5. (Left) From the bottom, keeping the tail end underneath the stitching line, advance the needle one stitch length forward and come straight up again at #3, at the precise point of the first stitch (#1).
(Left)
6. Keeping the tail end underneath the stitching line, advance one stitch length forward and stitch down at #4.
7. Stitching right to left, continue to the end of the row with the running stitch.
Ending a row with another Anchor Stitch (Locking Stitch)
When you are one stitch length away from the end of the row, make another locking stitch, (backstitch), in reverse to secure the thread.
To end a thread, the knot is buried between the layers. Take the needle to the bottom of the work and make a tiny 2-wrap quilters knot around the needle next to the fabric and re-insert the needle between the layers of fabric. As you exit the needle, pull the knot between the layers, and give a firm tug to pop the knot in between the layers of fabric. Clip the thread close to the fabric taking care not to snip into the batiste.
Enclosed shapes, such as circles, petals, leaves, etc., should be isolated and have a tiny locking stitch at the starting point and the stopping point.
The Running Stitch: (“Point avant”)
Every row is started with the Anchor Stitch.
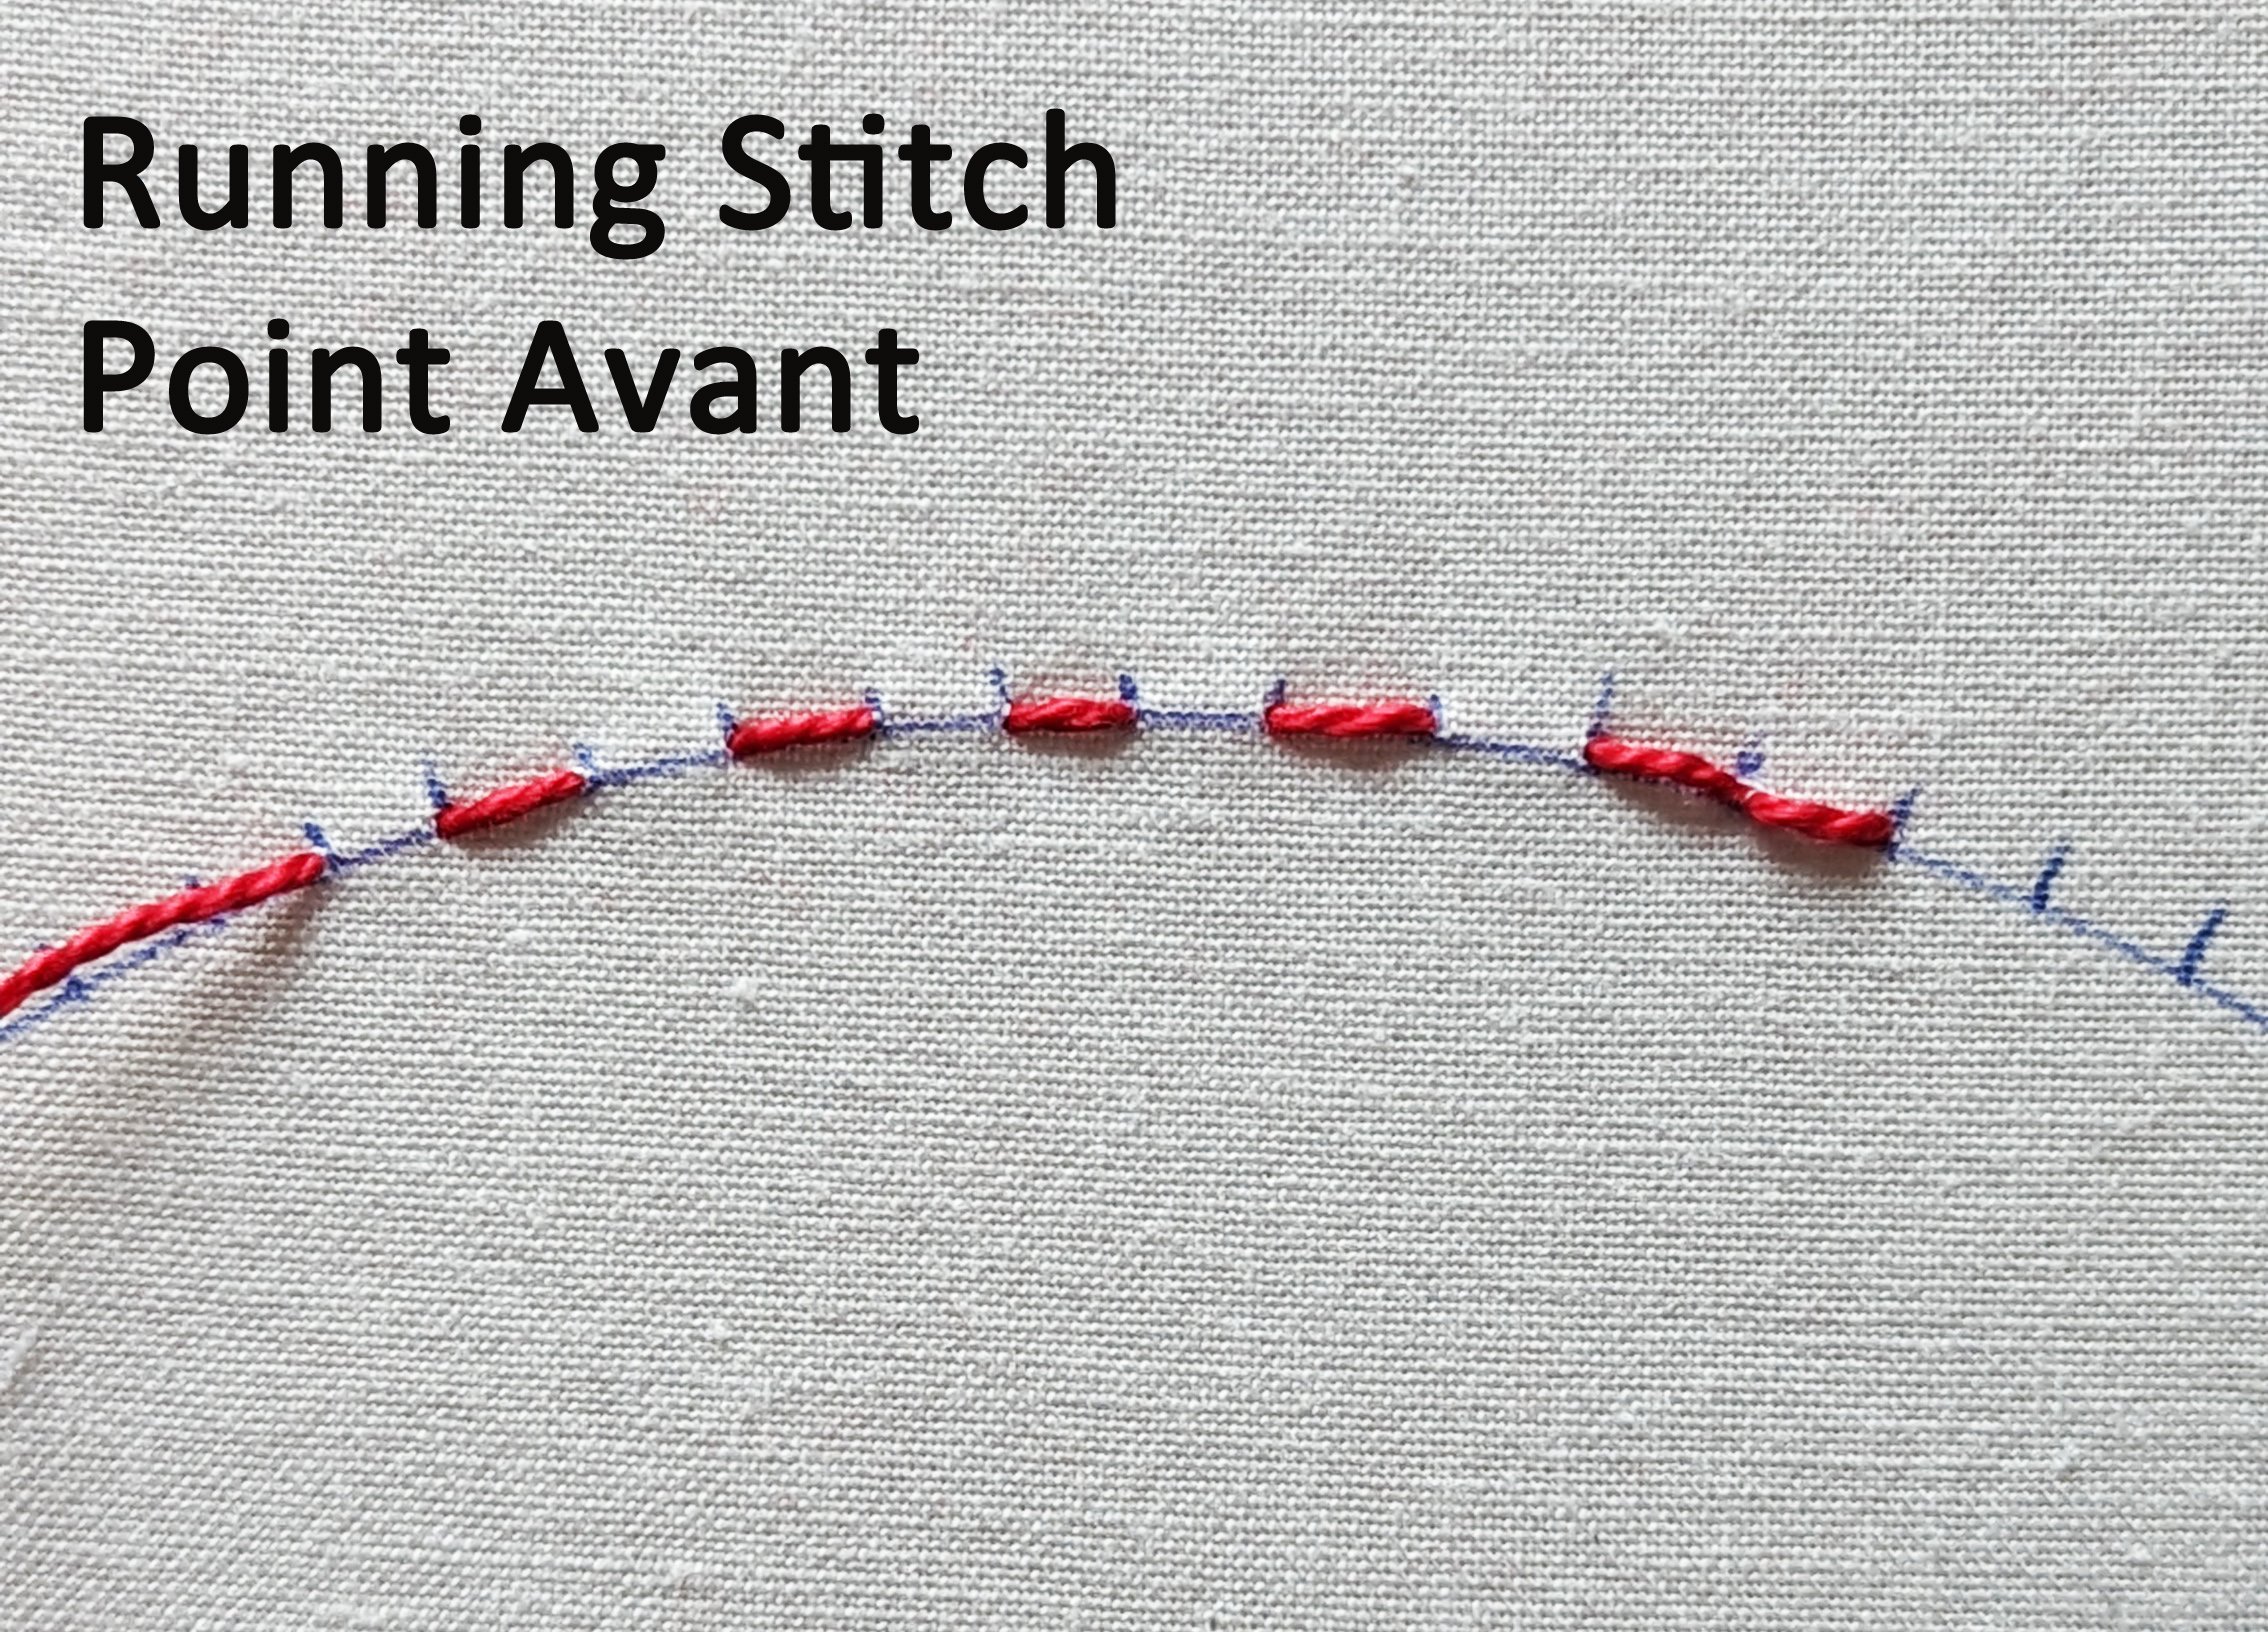

1. After making the anchor stitch, from the bottom, come up at #1.
2. From the top, advance the needle one stitch length forward and stitch down at #2.
3. Come up at #3.
4. Working from the right to the left, continue stitching this pattern making a row of small, even stitches that run in and out of the fabric through both layers.
- When you are one stitch length away from the end of the row, make another locking stitch in reverse to secure the thread, (see above). Just as when hand quilting, the goal is to achieve a row of small, evenly spaced stitches that are of equal length on the ride side and the reverse side of the work.
Stem Stitch: (Point de tige) Optional
(See Above) If desired, the Stem Stitch is another alternative which can be used to highlight the main motif.
It will also be used for the embroidery lines.
Stem stitch is worked from left to right.
1. Start the row with an anchor stitch.
2. From the bottom, take the needle up to #1.
3. From the top, advance the needle two stitch lengths forward and move down at #2.
4. From the bottom, take the needle one stitch length back and stitch up at #3, halfway between #1 and #2
5. Repeat this pattern to the end of the line.
A well-made stem stitch should have a backstitch underneath.
Gliding: To move between the rows
If the thread is long enough for another full row, it is possible to travel invisibly from one row to the next by gliding the needle between the two layers of fabric to the next row.
To Glide: Re-insert the needle between the layers of fabric at the exact point the last stitch was made.
Staying between layers, glide the needle to the starting point of the next row and take the needle to the top. When doing so, take care to travel only in the areas that will later be corded.
Embroidery: (broderie)
General Info: Unless otherwise instructed, embroidery takes place after the boutis channels have been stitched but before the project is corded. Note the placement of the embroidery lines on the pattern guides below. (Refer to the pattern guides in the next section)
Using your favourite embroidery floss, cut a length of about 16” – 18”and separate the floss into individual strands. Using only one strand of the floss, stitch the embroidery lines with the stem stitch (see above) or an embroidery stitch of your choice.
Stitching Order:
All stitching is done with a single thread using a running stitch, or if desired, a backstitch or a stem stitch can replace the running stitch. Make sure to lock in the stitches at the beginning and at the end of a thread.
In general the pattern is always stitched from the center of the design to the edges of the pattern starting with the central motif. Specifics are given below.
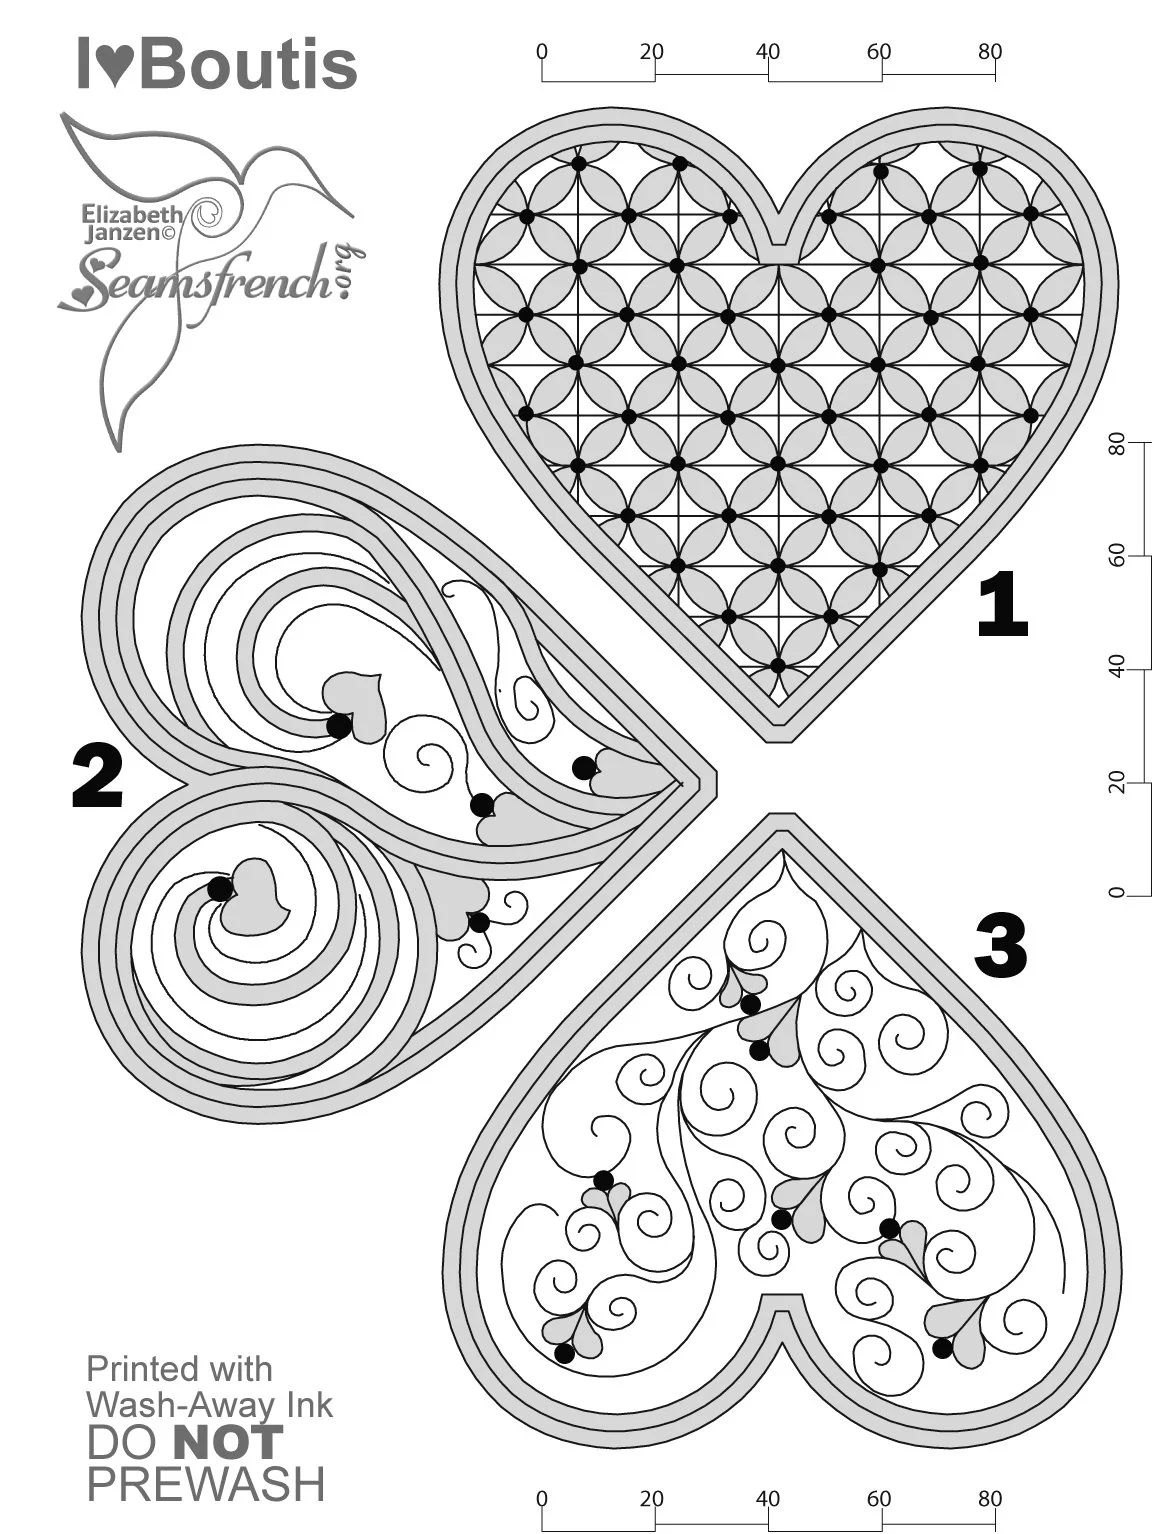
Heart #1: Stitching Order: Cross My Heart
1. Starting with the longest diagonal row of petal shapes, from the top and following the over/under flow of the curved pattern, with the running stitch, stitch all the way down and then return in the opposite direction. End your thread with an anchor stitch.
2. Stitch the opposite side of the diagonal channel the same way.
3. Following this pattern, work your way up and down each side of the heart, alternating between diagonal rows.
4. Return to the top of the heart and complete each diagonal row of petals.
5. Following the same stitching pattern complete both sides of the heart, moving from the inside channels to the outer channels.
6. Border: Starting at the top of the innermost channel, make an anchor stitch and stitch down to the point of the heart. Before locking the last stitch, ease the stitches by gently pulling your thumbnail over the stitches to avoid shortening the channel with stitches that are too tight.
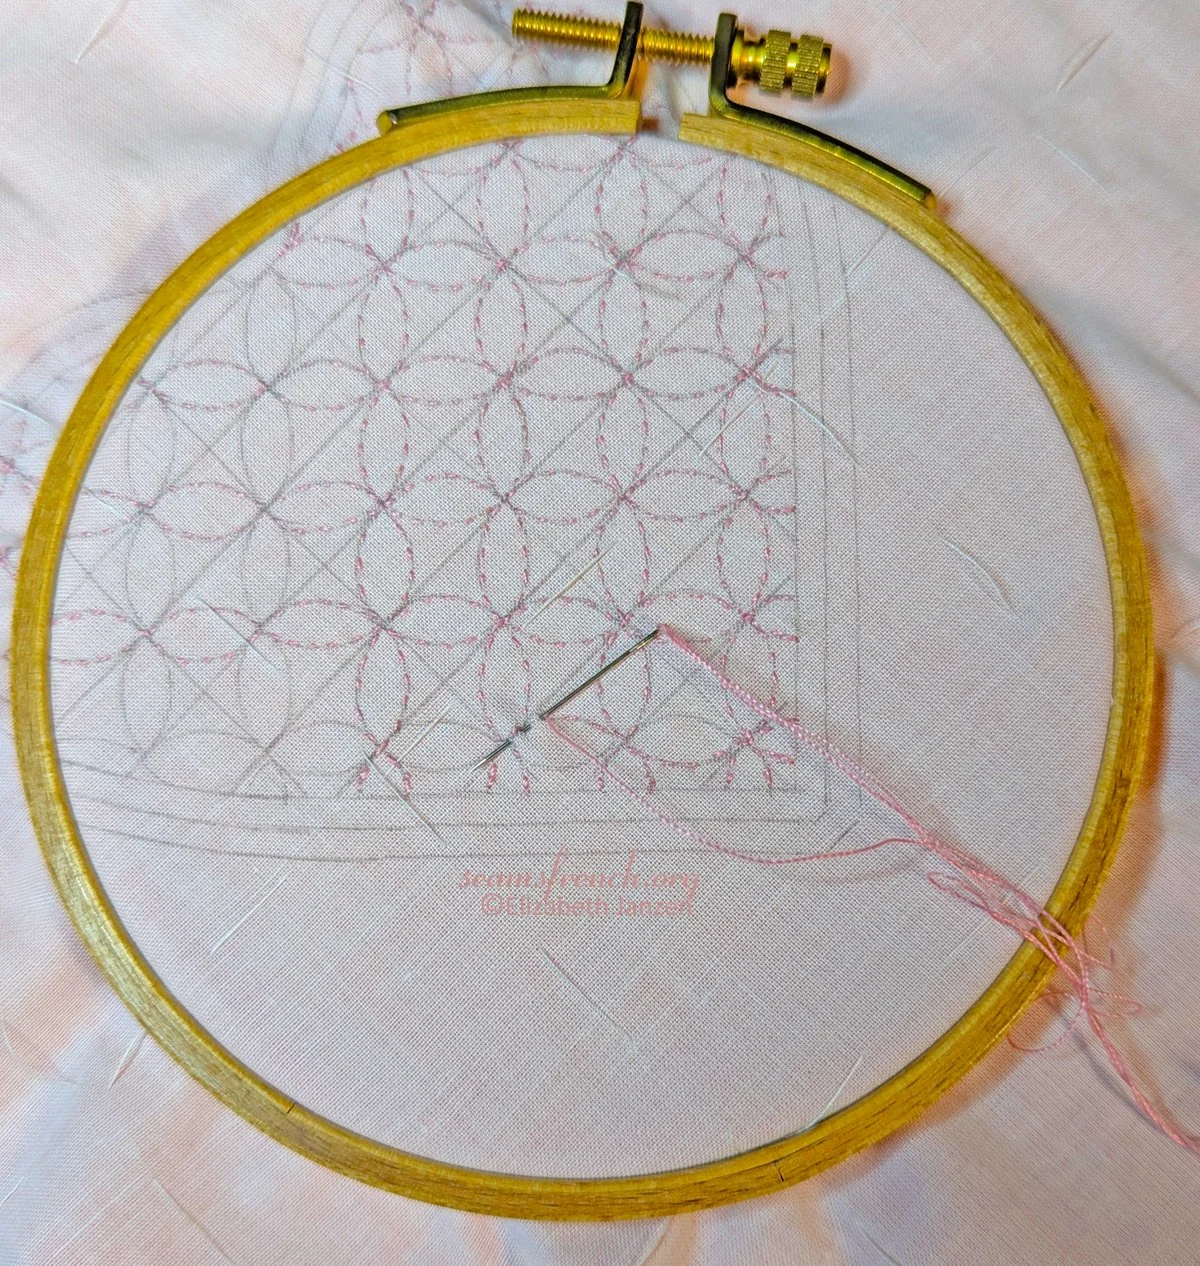
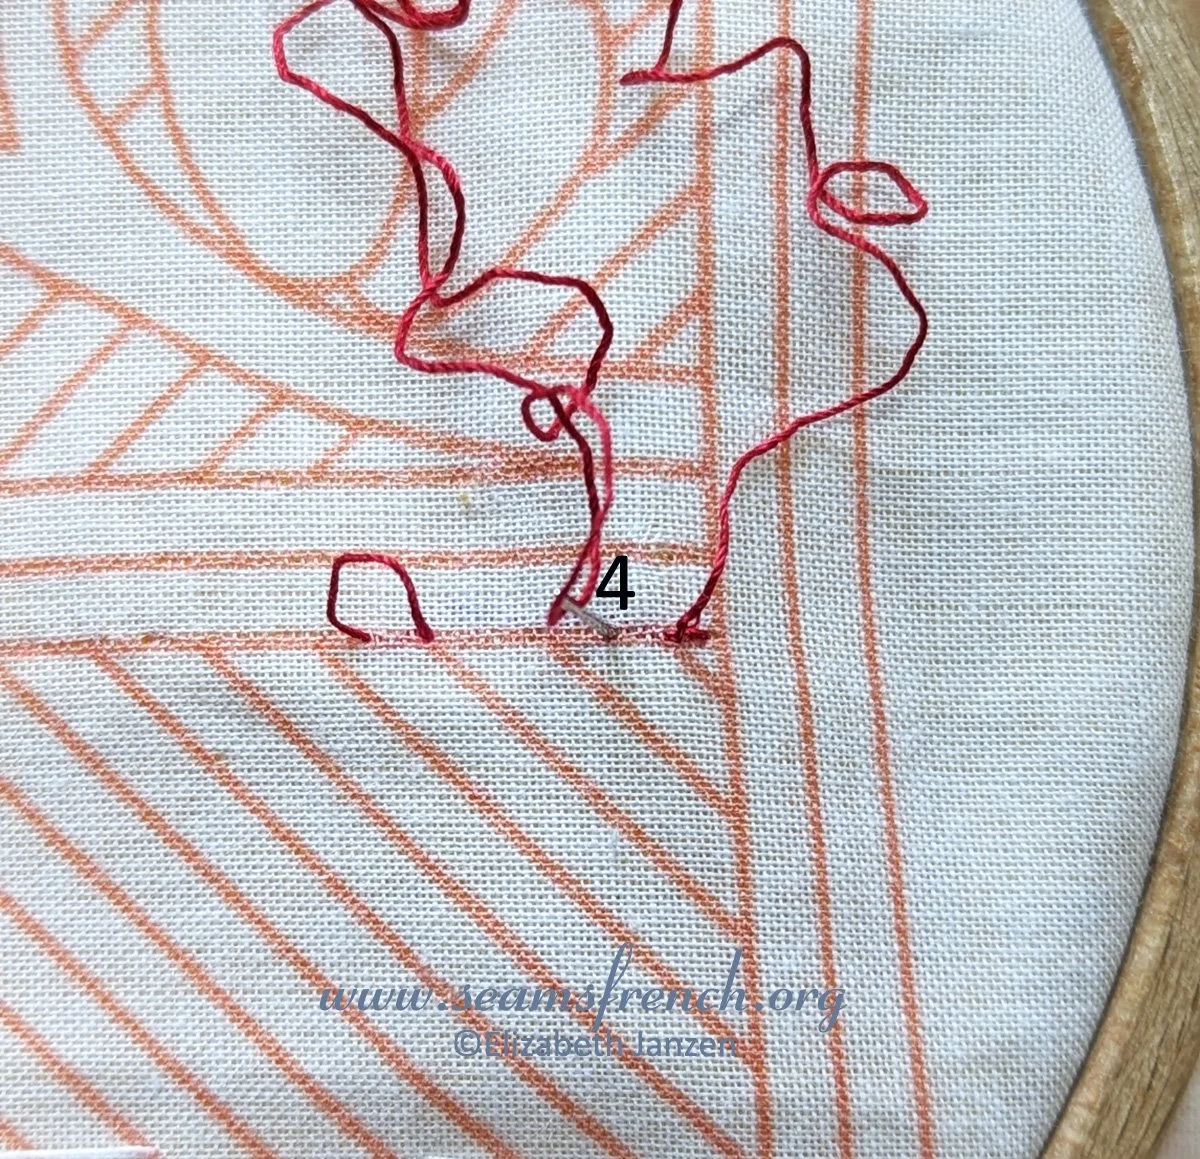
Embroidery: With a stem stitch, embroider the vertical and horizontal lines using 1 strand of the floss. Ensure that the knots are buried between the layers and your stitches are neat on both sides of the project
Heart #2: Stitching Order - Heart and Scroll
Starting with the longest channel in the middle of the design, using a running stitch, stitch your way around the entire scroll.
Following the lines of the channels, work your way towards the center of the scroll, stitching every line.
If you have enough thread on your needle to finish another full length of a drawn line, you can glide to starting point of the next line to be stitched. If you do not have sufficient thread to finish another entire line, lock in the thread, bury the knot and clip.
(Start a new thread for the next row. Avoid stopping and starting mid stitching line.)
When one lobe of the heart is complete, move to the next side and complete it following the same order; from the longest channel to the center of the scroll.
Border: Starting at the top of the innermost channel, make an anchor stitch and stitch down to the point of the heart. Before locking the last stitch, ease the stitches by gently pulling your thumbnail over the stitches to avoid shortening the channel with stitches that are too tight.

Embroidery: With a stem stitch, embroider the little hearts and scrolls that are single lines. Ensure that the knots are buried between the layers and your stitches are neat on both sides of the project